Zyxel switch fan replacement mod
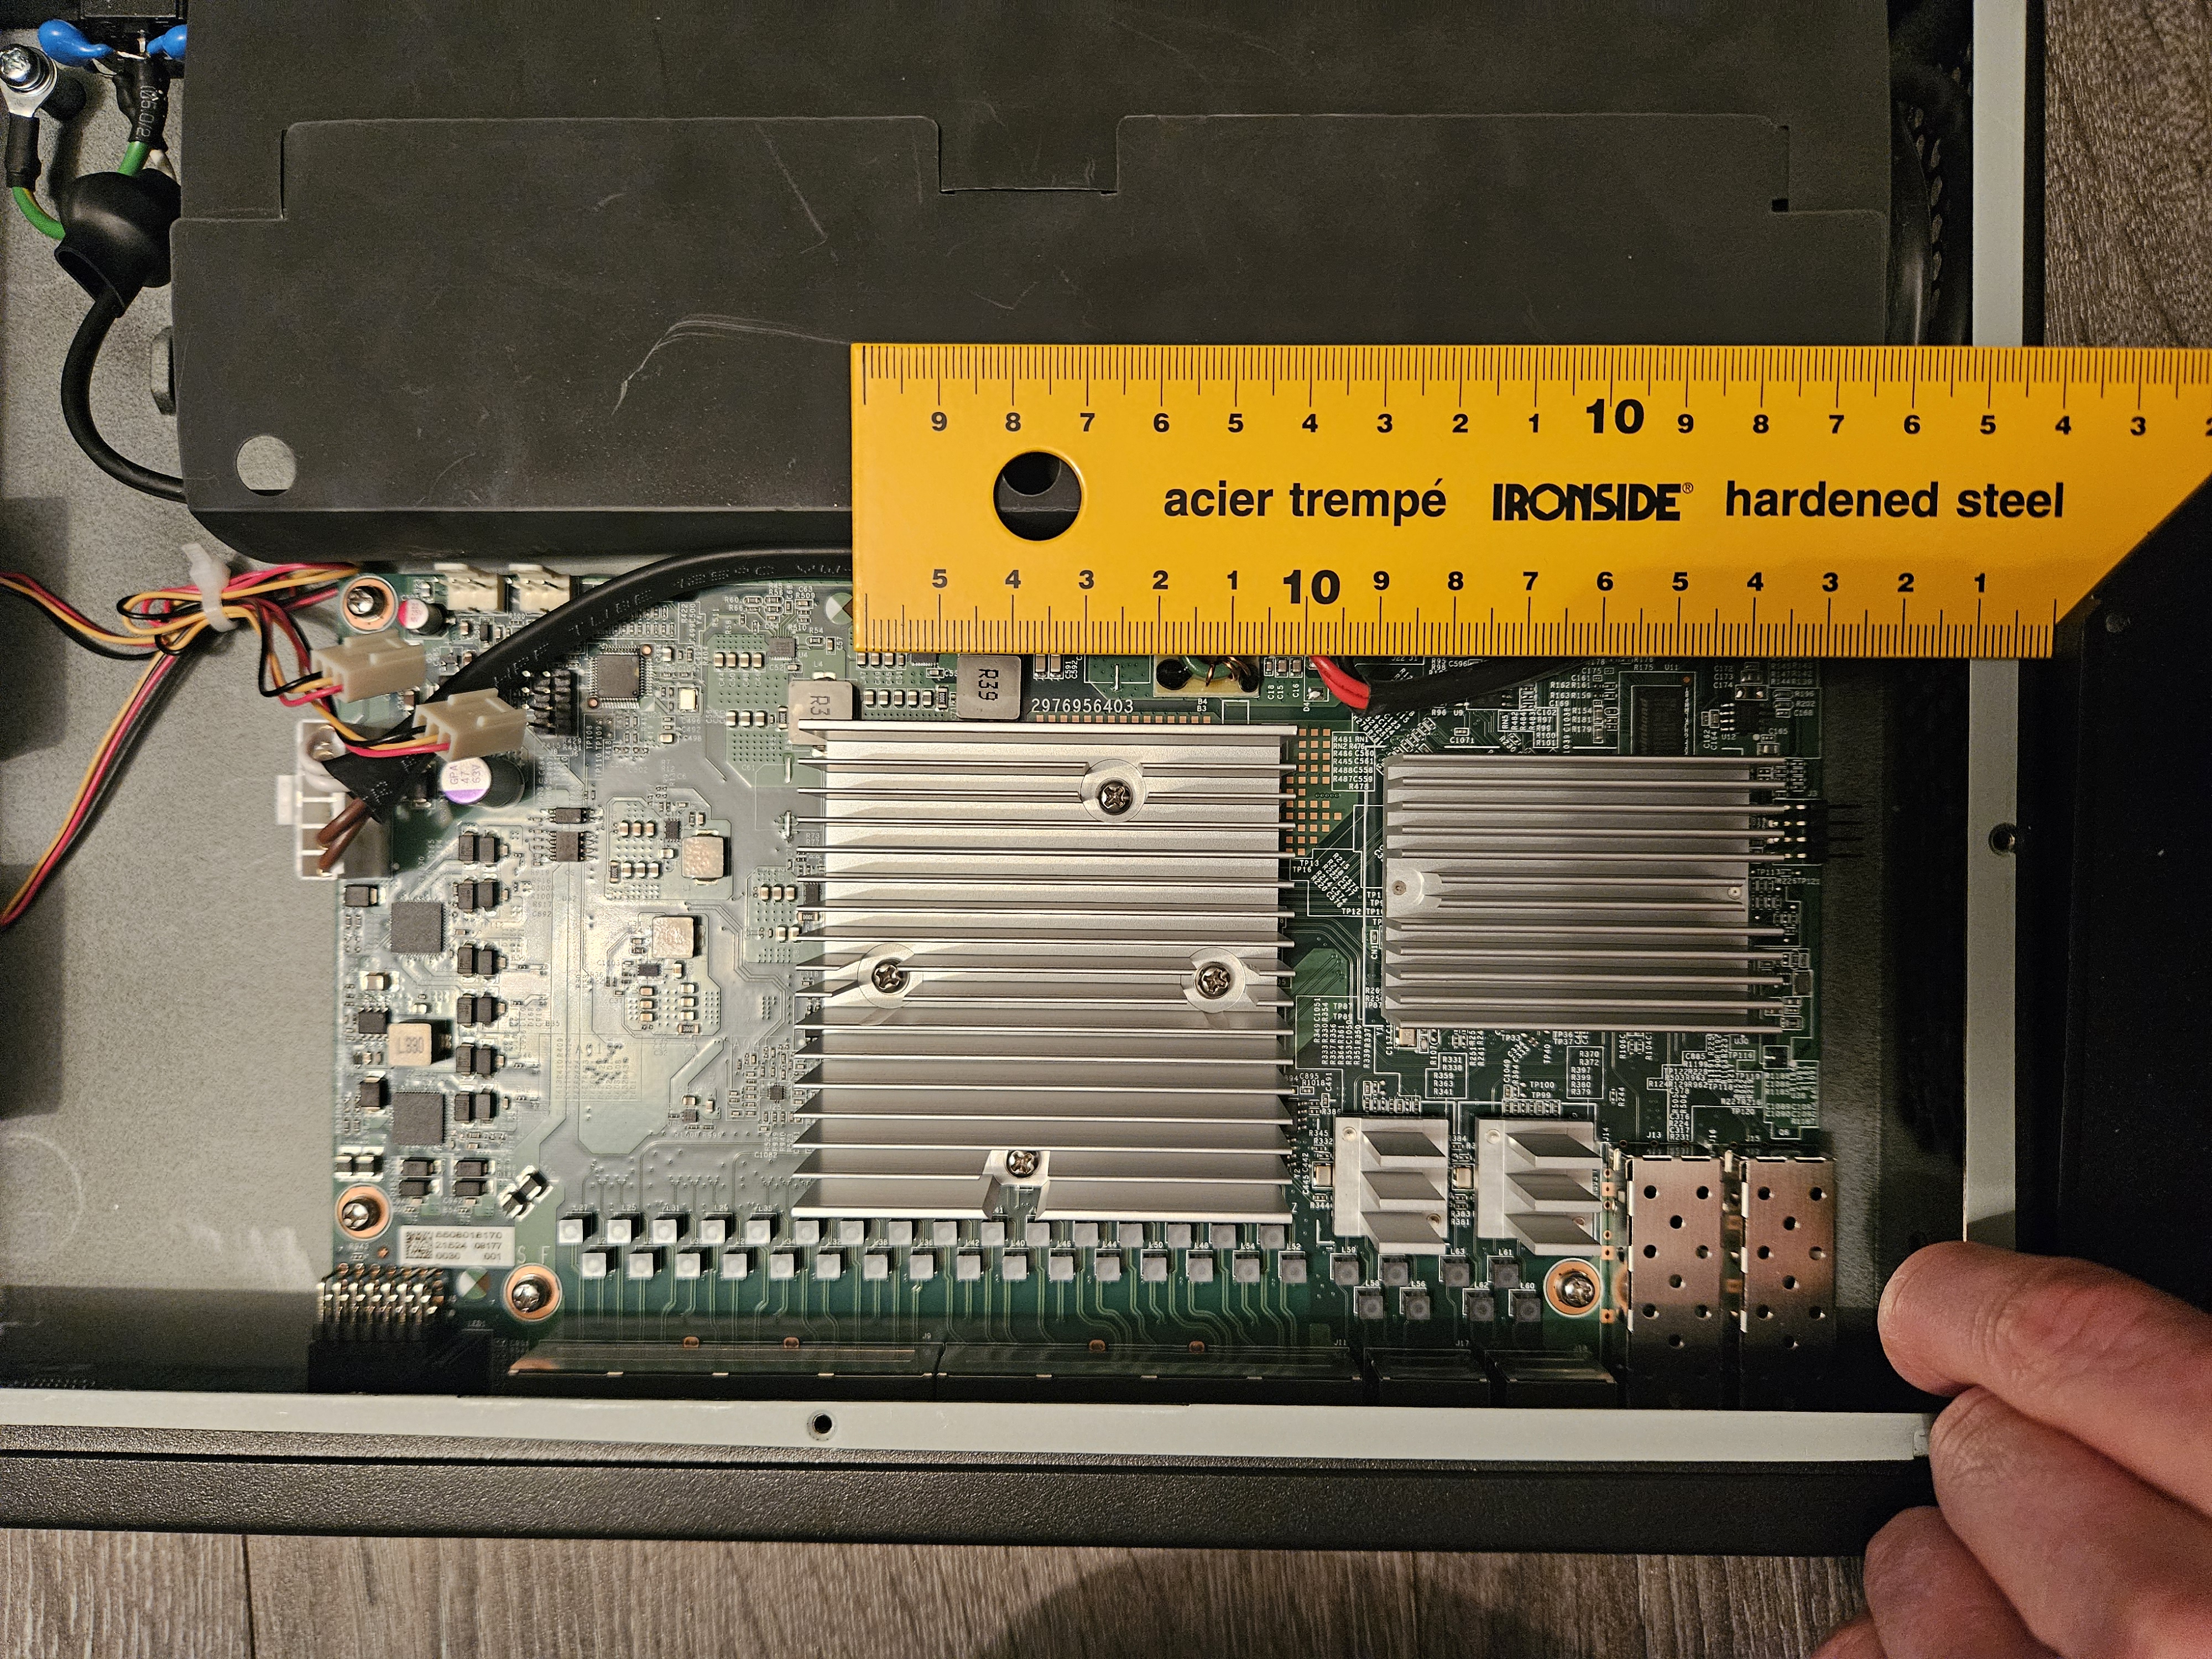
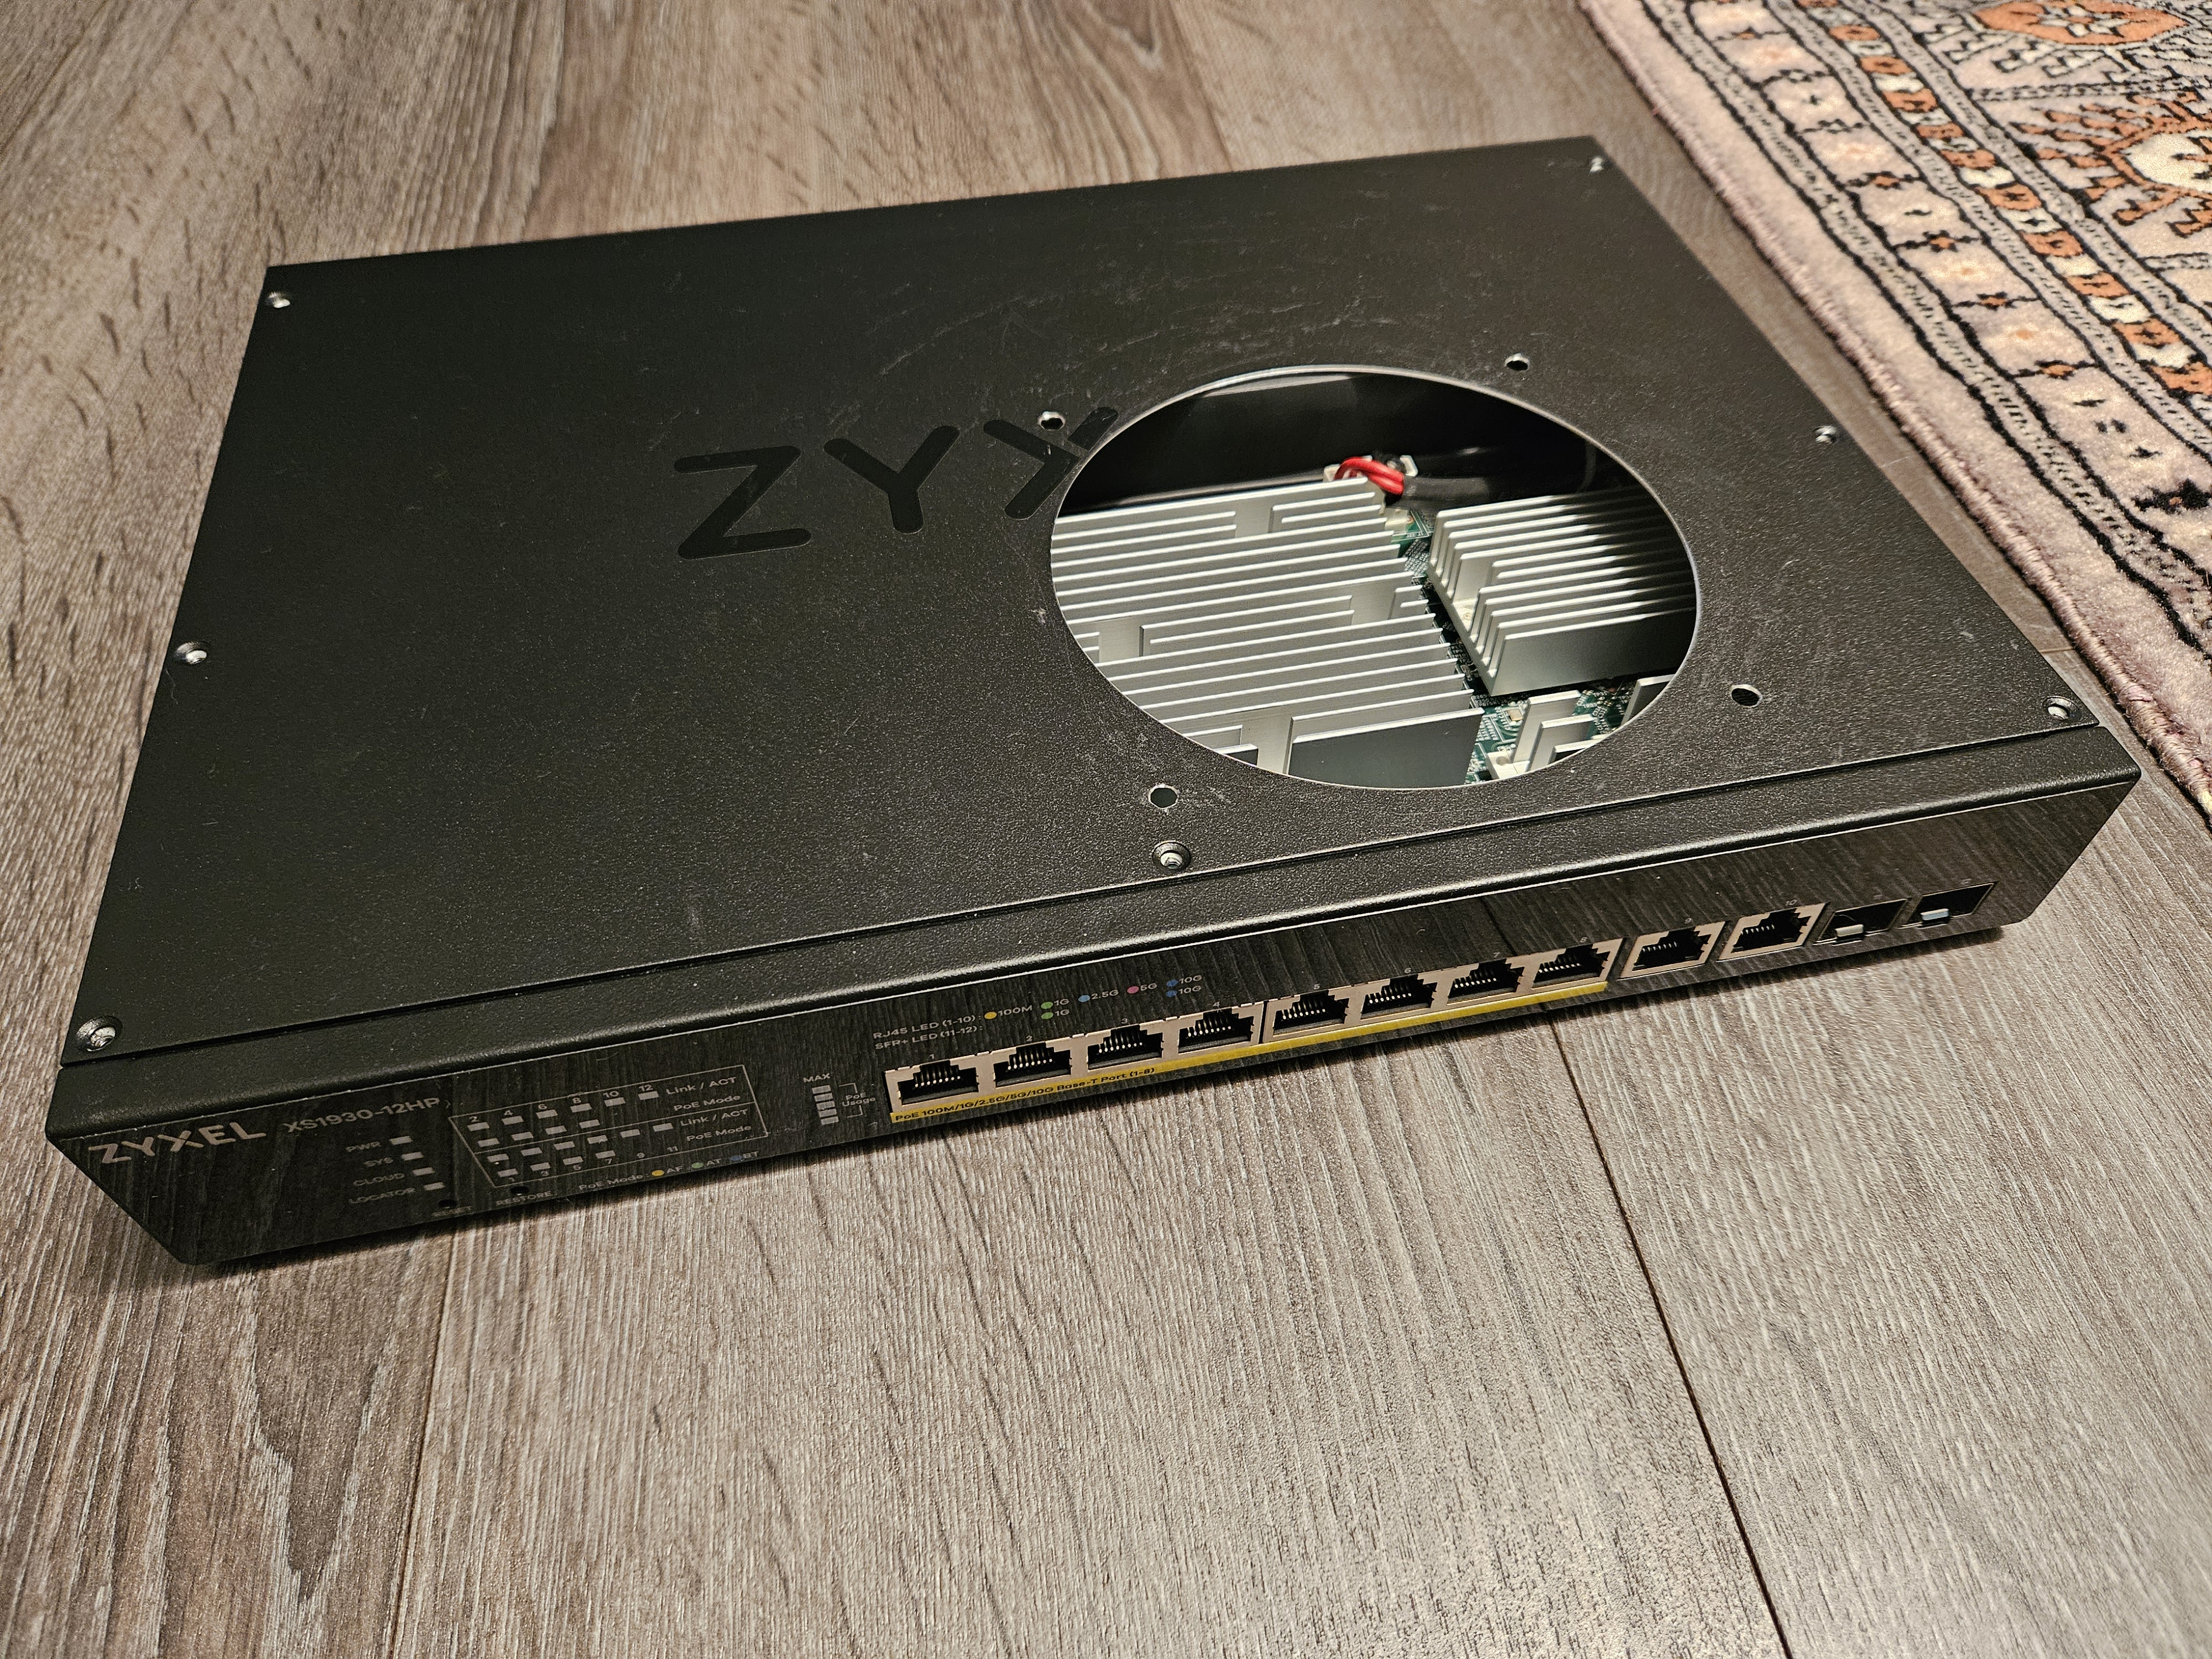
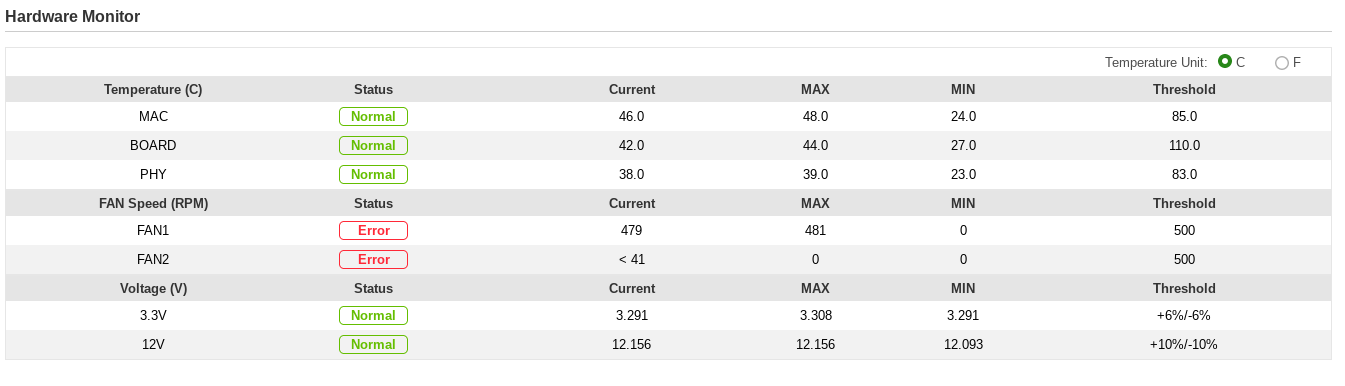
Replacing loud switch fans with silent one One thing I noticed when I powered on my new Zyxel XS1930-12HP first times is how it had noisy fans. They defintely were not the worst possible offenders and it clearly has some sensible temperature based fan curves but still in my livingroom they were definitely noticeable. So I started looking for ways to make the switch quieter. Noctua actually sells 40 mm fan replacements for this exact use but tbh I just don’t think 40 mm is good fan form factor. I started planning putting in a proper PC case fan somehow. Luckily the case did not have any major obstructions internally so putting a 120 mm fan seemed just possible enough. In this pic the general layout of the internals are kinda visible (the shadows of the loud fans are barely visile at the right side): I just needed to make hole somehow in the case. I ended up using a 121 mm (4 3/4 inch) hole saw which in theory was good idea. Unfortunately instead of using a drill press like sensible person I used a small cordless drill with the hole saw. It did eventually manage to cut through the thin sheet metal case but I definitely would not recommend doing it this way. It was messy, took ages, and I also scratched the paint finish pretty badly. Nevertheless I finally got a hole: Now I only needed to wait for my new 120 mm fan (Noctua NF-A12x25 ULN) to come in mail so I could install it. I also got a generic dust filter for the fan which was an excellent move on my part. Before I could plug the new fan in I needed to rewire the connector because the original fans were using non-standard pinout. It was also quite fiddly process, proper way would have been to get some extra connectors and make separate adapter. But now it is there and whenever I end up ripping the fan out I’ll probably will have completely forgotten that it has weird pinout. Here is the finished result: It is definitely not very aesthetic. It is also noticeable that the hole is somewhat oversized. That is because the 121 mm hole saw was already slightly oversized to begin with and the messiness of me using it led the hole becoming even more oversized. I’m contemplating to put in a cardboard shim in there to clean it up and make sure no air/dust goes through the gaps. But tbh I’m kinda done with this side-project so I’ll probably leave it as-is for now. Another minor issue is that half of the fan mounting thingies are holding the fan in place and the other half are holding the filter. It would be better if both were mounted in every corner. At least so far there hasn’t been any weird vibrations or anything so I guess it’s not a problem. One problem is that the switch hardware monitor is not very happy about the new fan. It is reporting error on both one fan missing and the new fan spinning too slowly. It’d be great if that could be configured somehow to better match the modded situation – it wouldn’t hurt if the fan curve were bit more aggressive now. I guess that might be too much to ask. This also means that there is now a red error led permanently lit on the front panel :( But at least the temps look alright: Finally I do have slight concern that the power supply side might now get less airflow which might cause problems down the line. But there is not much I can do about that without compromising the safety factors in the design; in the internals picture the power supply is under the black plastic shroud. I assume that was done for either electrical insulation, or to prevent damage from exploding caps or something like that. Either way the shroud is blocking all airflow to the power supply currently which is not ideal. But tbh I’m not sure how much airflow there was originally in there.